Grafting a new button and fitting a through-patch on a back plate
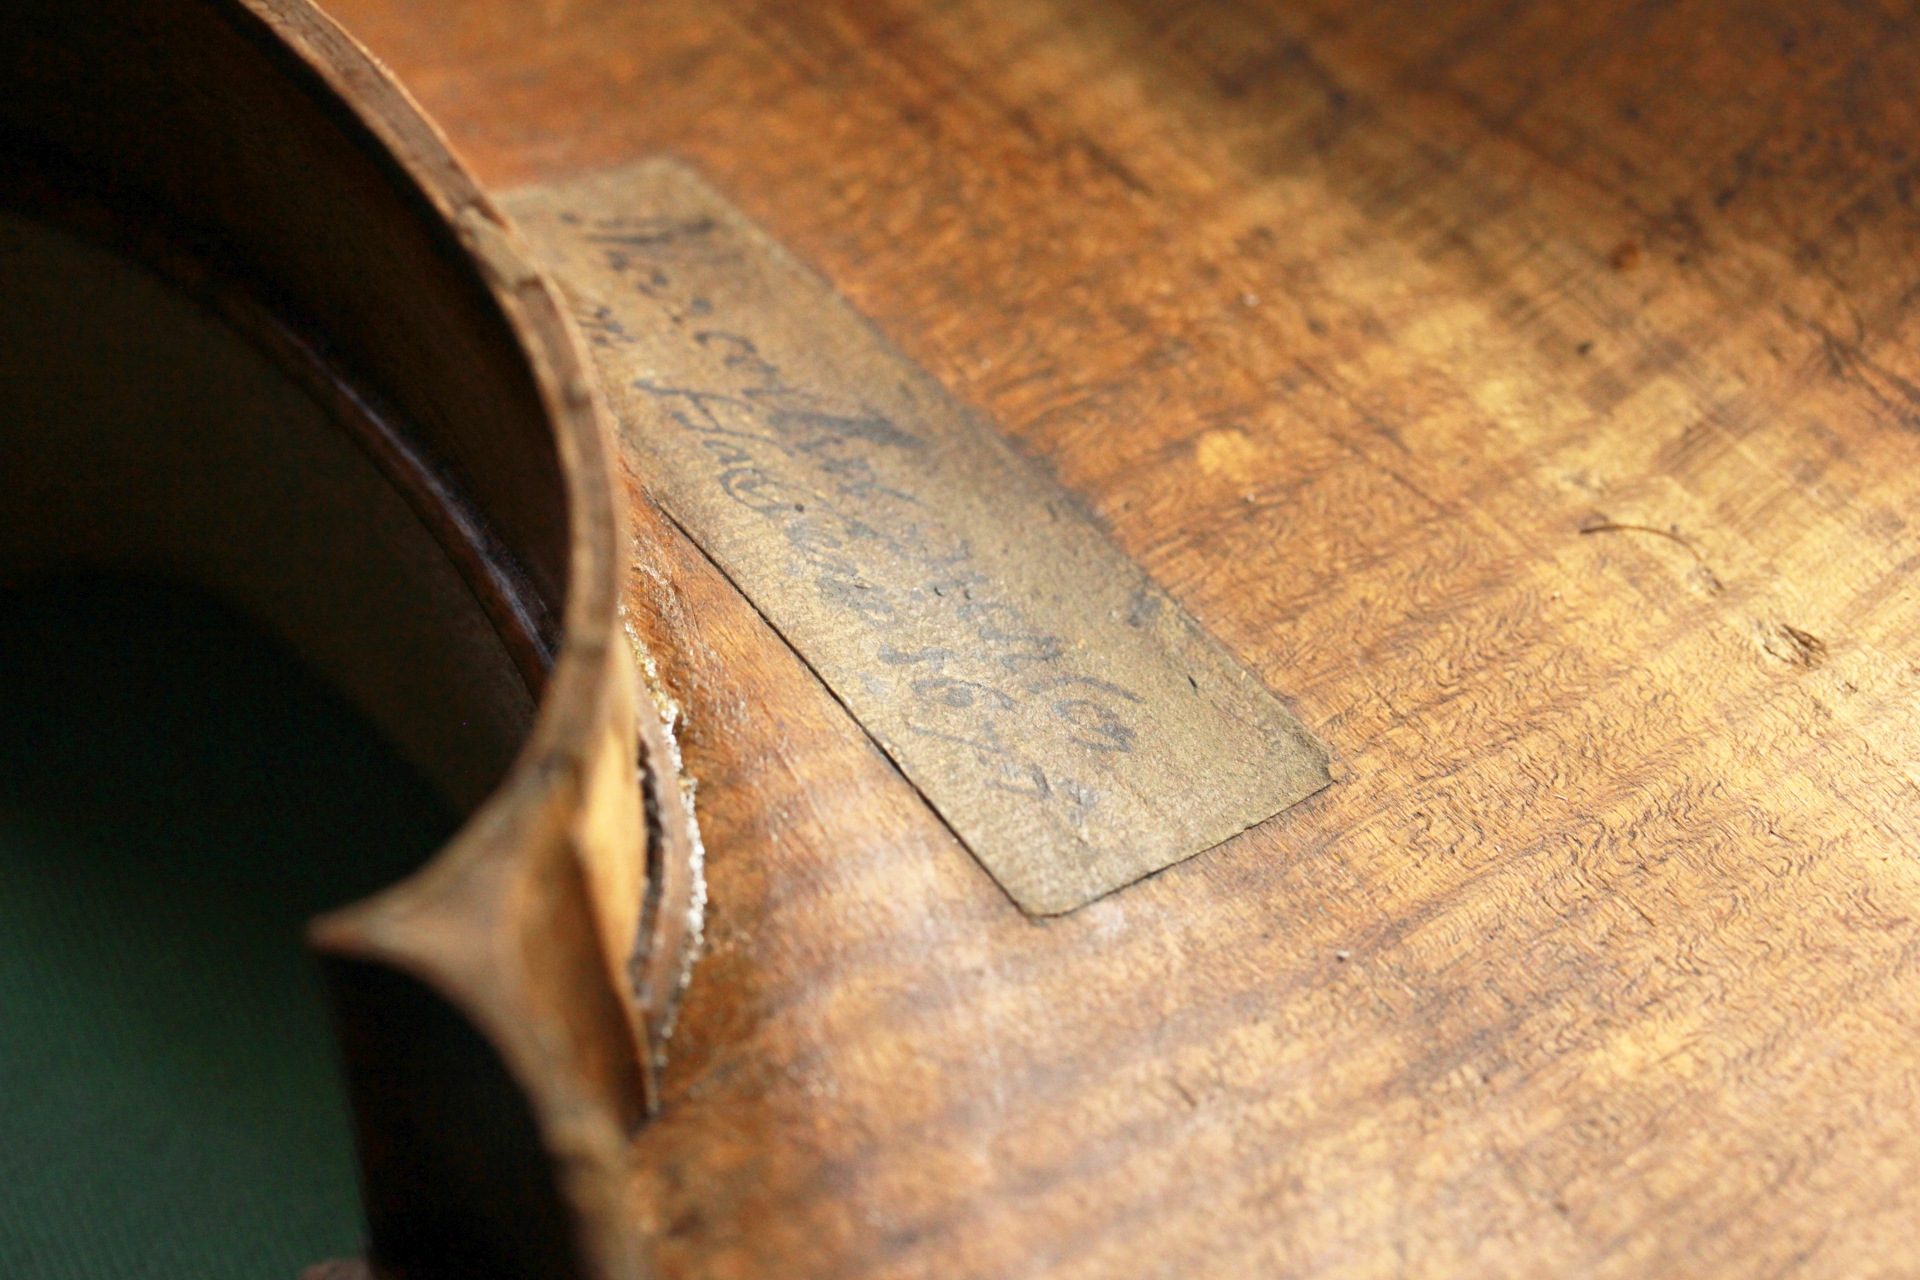
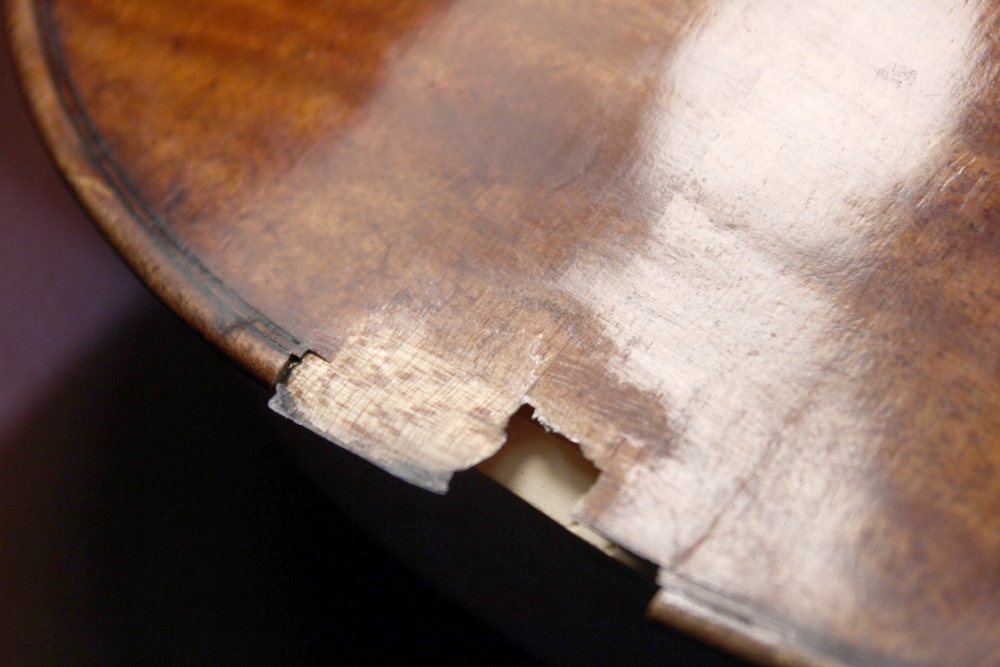
In this article about a restoration of a back by the Amati brothers, you will see that even serious damage can be mended successfully. The existing button has been repaired several times, but had now broken off, extending into the arching.
Castings & tending to the cracks
After removing the (distracting) retouching in the area of the button, the first step is to make a detailed cast of the arching. This serves as a counterform for all work to follow and “stores” the back’s shape, so to speak. Since the damage extends into the arching, some of its shape is missing in the cast and must be incorporated into the negative. After that, all damaged remains can be safely removed. Now, the cracks, which were previously covered by a patch, are readily accessible for opening, cleaning and re-gluing.

Strategy for rebuilding the damaged area
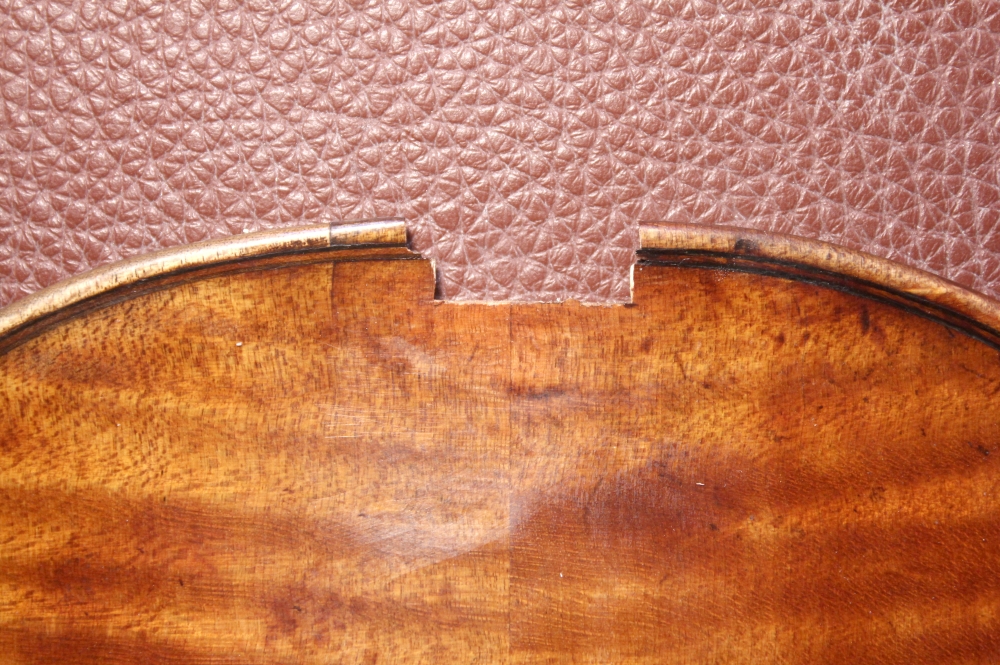
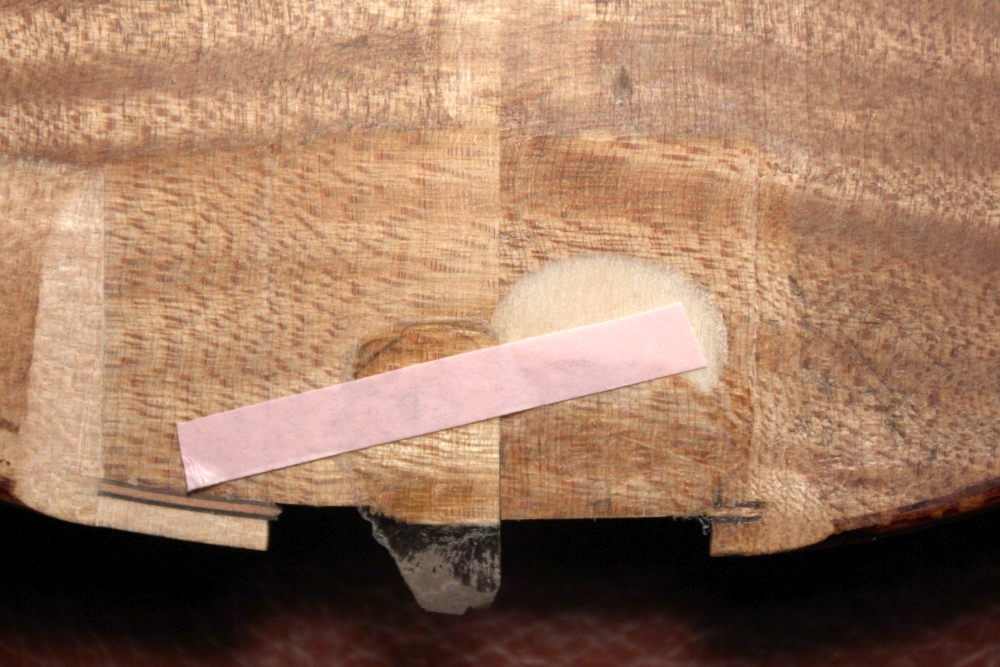
To rebuild the damaged area, several strategies can be followed. The stepped tear-out is particularly difficult to resolve. It should be restored in an aesthetically pleasing manner and secured as durable as possible. Fitting a replacement piece with a blunt joint will not achieve this here. Overall, the most pleasing, but also the most complex solution here is the following. First, to “fill” the torn-out area with shavings of original wood. And second, to fit a patch on top, securing the shavings and providing body for the new button. To do this, two wide chips are carved out on the future patch bed to the left and right of the center joint. Then, one thins out the damaged area “to zero” in a shallow curve right to and slightly into the cast. In this way, the original continues completely seamlessly into the shape provided by the cast.
The first shaving
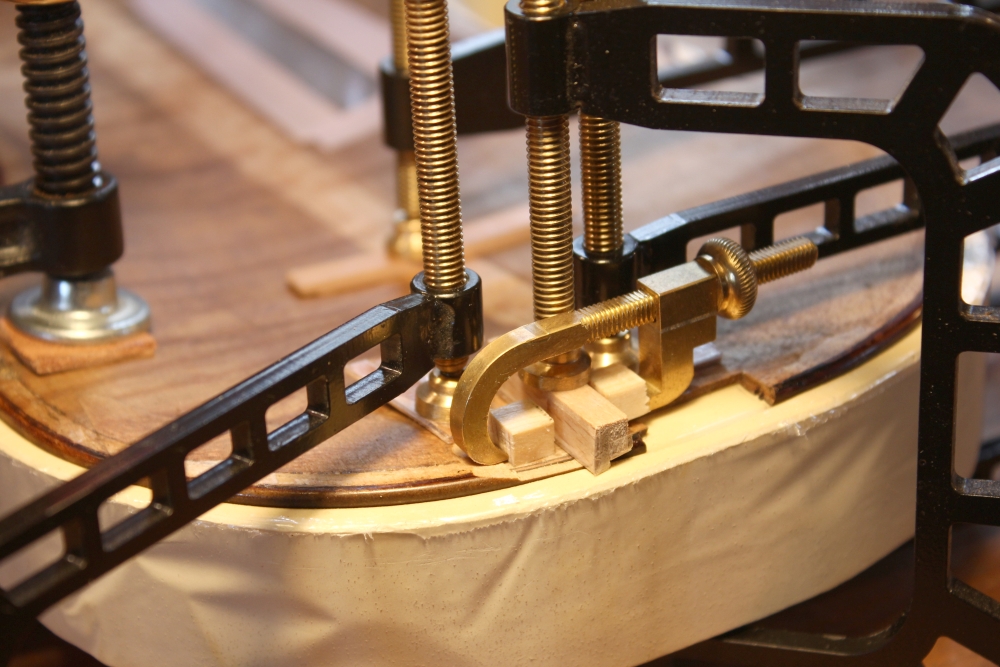
Now, the first shaving can be aligned so, that direction of annual rings and wood features follow the original nicely. Being of adjacent original wood, the grain direction, wood color and texture are coming very close to the original. Consequently, this makes the retouching substantially easier. One now fixes the shaving temporarily with a small strip of adhesive and then glues it in with a little sandbag. Here, the shape of the casting defines what shape the shaving will take.
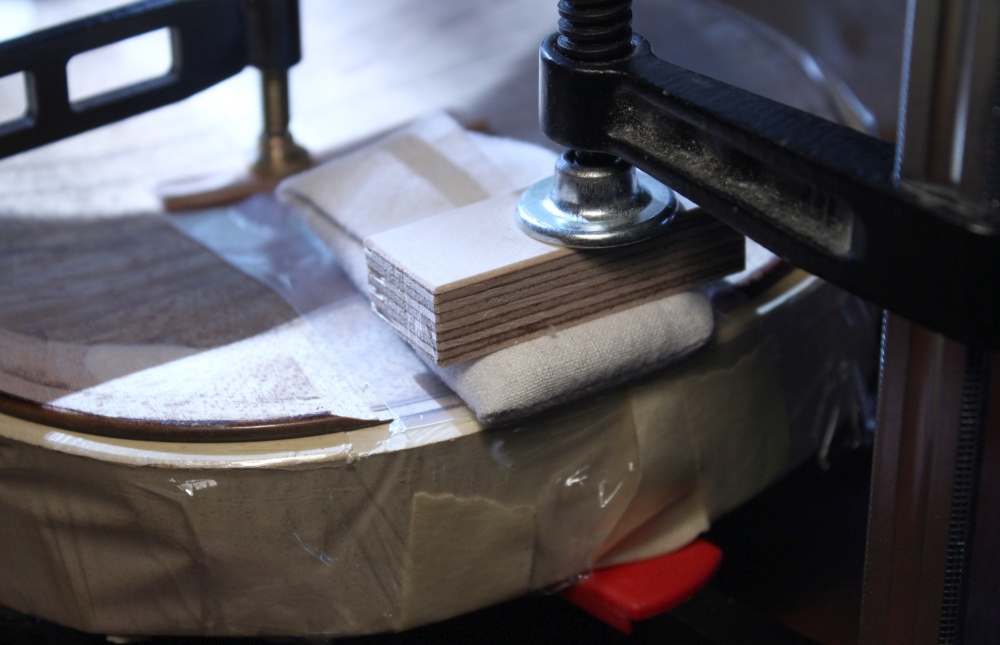
The second shaving
After cutting the center joint one can glue the second shaving in the same way. Then, fitting and gluing an intermediate patch holds the paper-thin shavings in their intended shape.
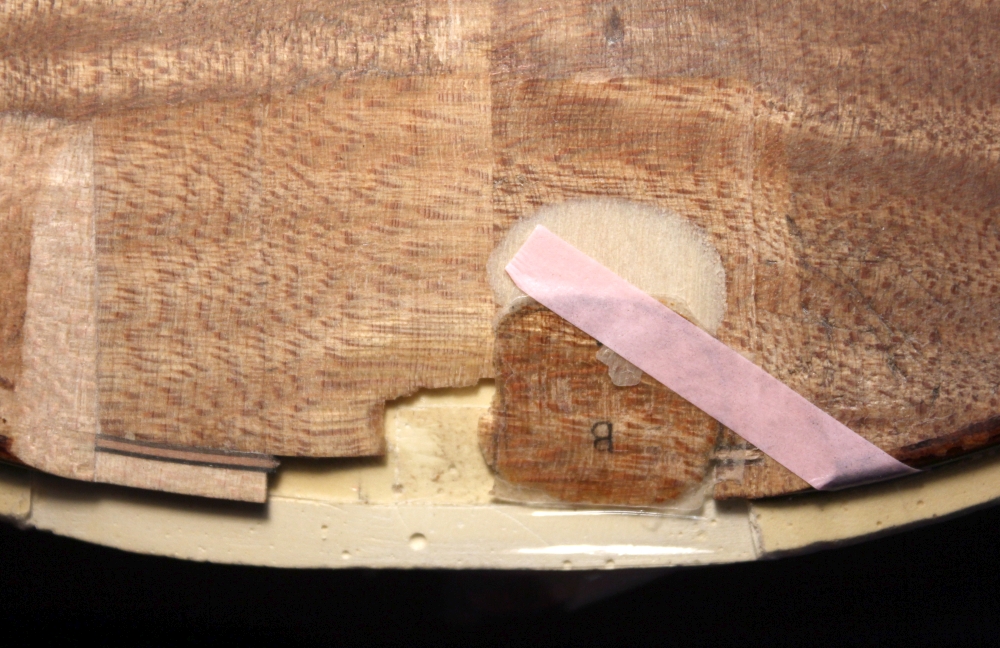
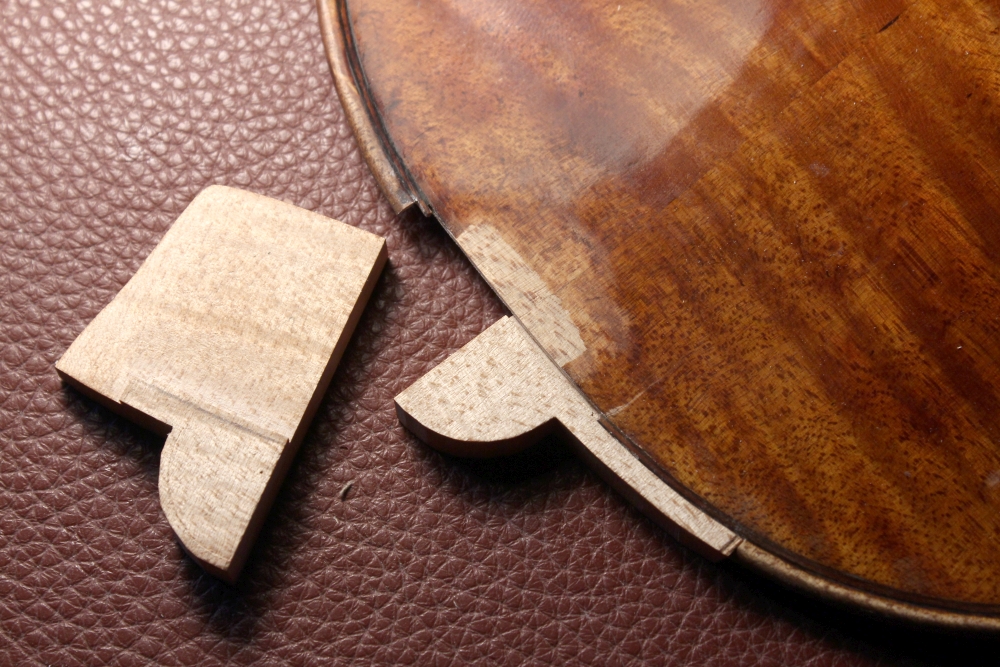
The two-piece patch for rebuilding the button
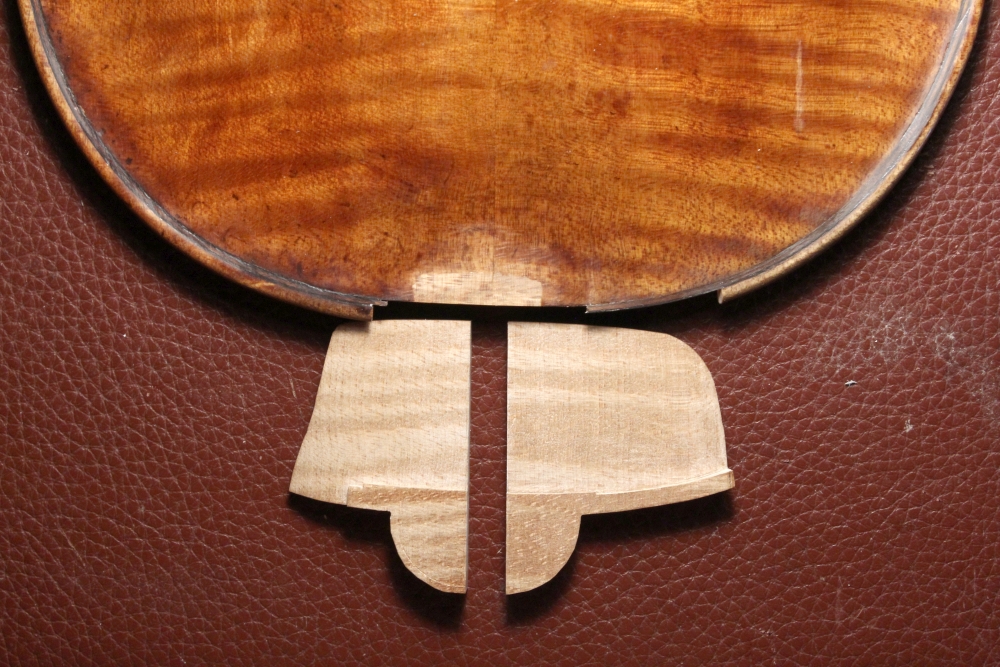
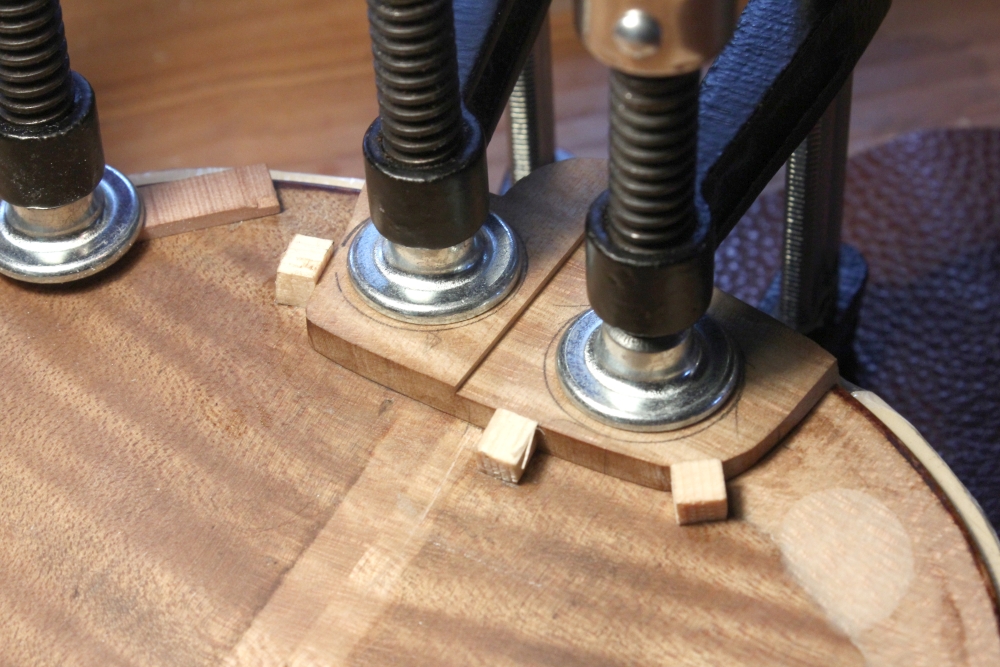
Now we can turn our attention to the button itself. An excellent method of restoring it in a structurally durable and aesthetically pleasing way is to do a “single-fit”. In that, the gluing surface, edge and button itself are formed from one solid piece of wood. In the case of a center joint, one rebuilds that as well by using two solid pieces. After shaping the mating surface on the original, the two parts are pre-fitted and then gently baked to match the color.
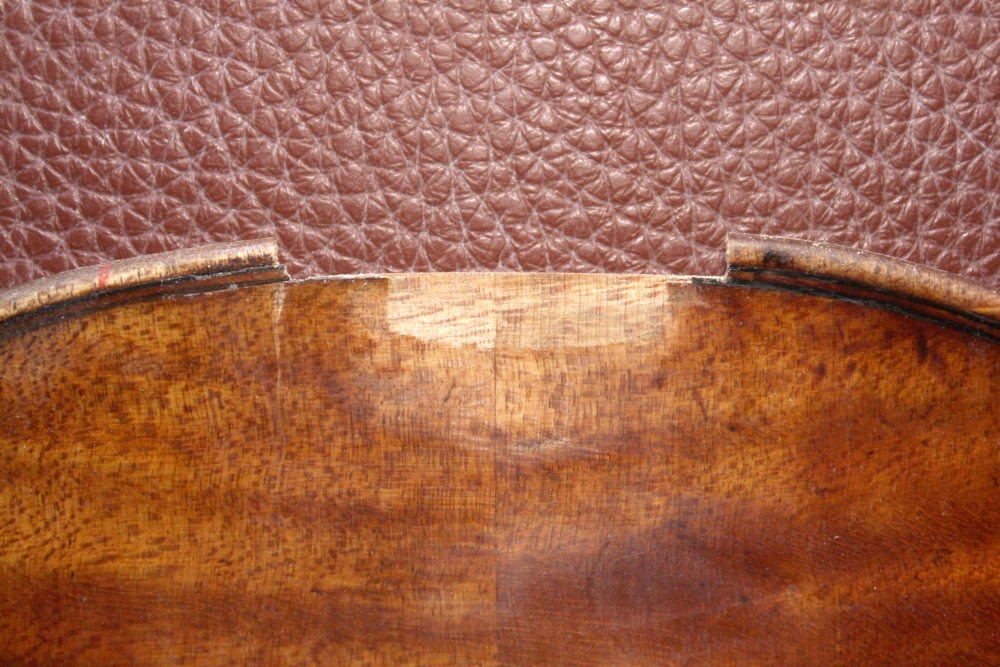
In the subsequent fine-fitting we now create a flawless joint to the original. First for one piece, then for the other. The two parts are then glued in one go. Worth noting is the shape of the patch. 1) The side joints inside the purfling are slanted and gently trough-shaped. This helps in preventing cracks. 2) The edge joints outside the purfling are cut following the annual rings. This is visually appealing and preserving original material.
Fertigstellung
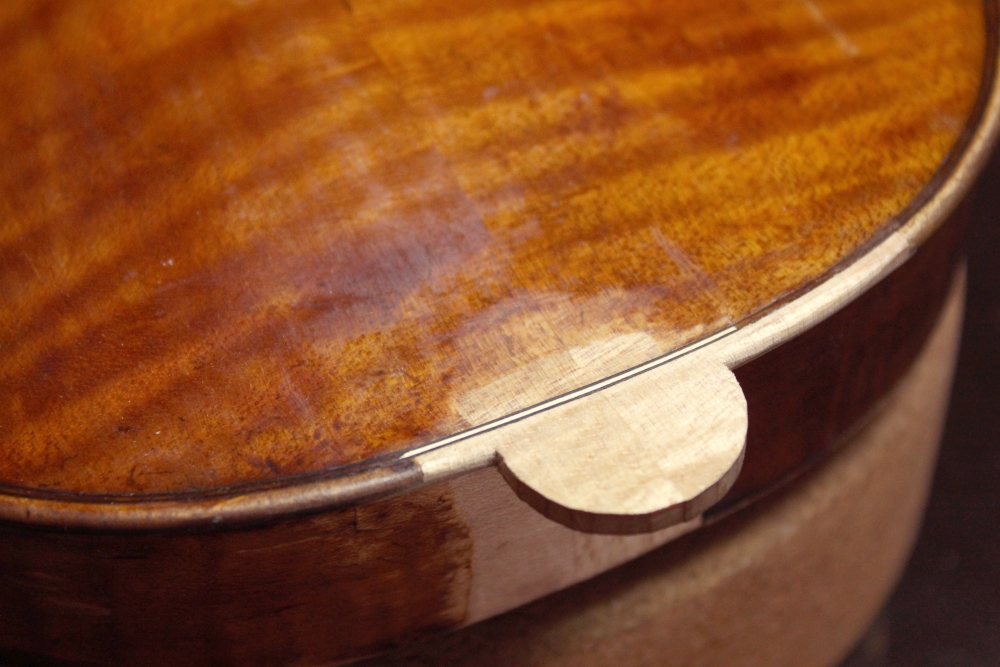
After inserting a small piece of missing purfling, the new button, edge, inner gluing surface, and the arching can be reshaped. My dear colleague Henriette Lersch, who I collaborated with on the overall restoration project, carried out the retouching. You can find more information on this in her blog under “The total makeover” (https://lerschgeigenbau.at/aktuelles.html; accessed on 11/17/2025).
Addendum: Renowned experts are working on the attribution of the instrument. Current knowledge says, some parts are early replacements from the 18th century, while the back in particular can be ascribed to the Amati brothers.
